According to Paula Taylor, Trends and Design Expert, Superfresco Easy, wallpaper will bring tactility and vibrancy to our homes in 2023, bringing out the haptic trend that is a sensorial delight. Adding pattern to a wall can instantly uplift the mood of any resident and create a welcoming atmosphere to any home. It can be used to express the personality of the homeowner, or it can be used to create a calming neutral environment for all to feel comfortable in. Pattern and colour have intense mood enhancing properties.
Paula recommends those starting with wallpaper to look to Pinterest and magazines to gather information. Creating a virtual or physical mood board of what you like is a good way to hone the perfect look.
With walls providing the perfect blank canvas for expression, Paula Taylor considers the key wallpaper and colour trends that will define our homes in 2023.
2023 Key Colour Trends: Neutrals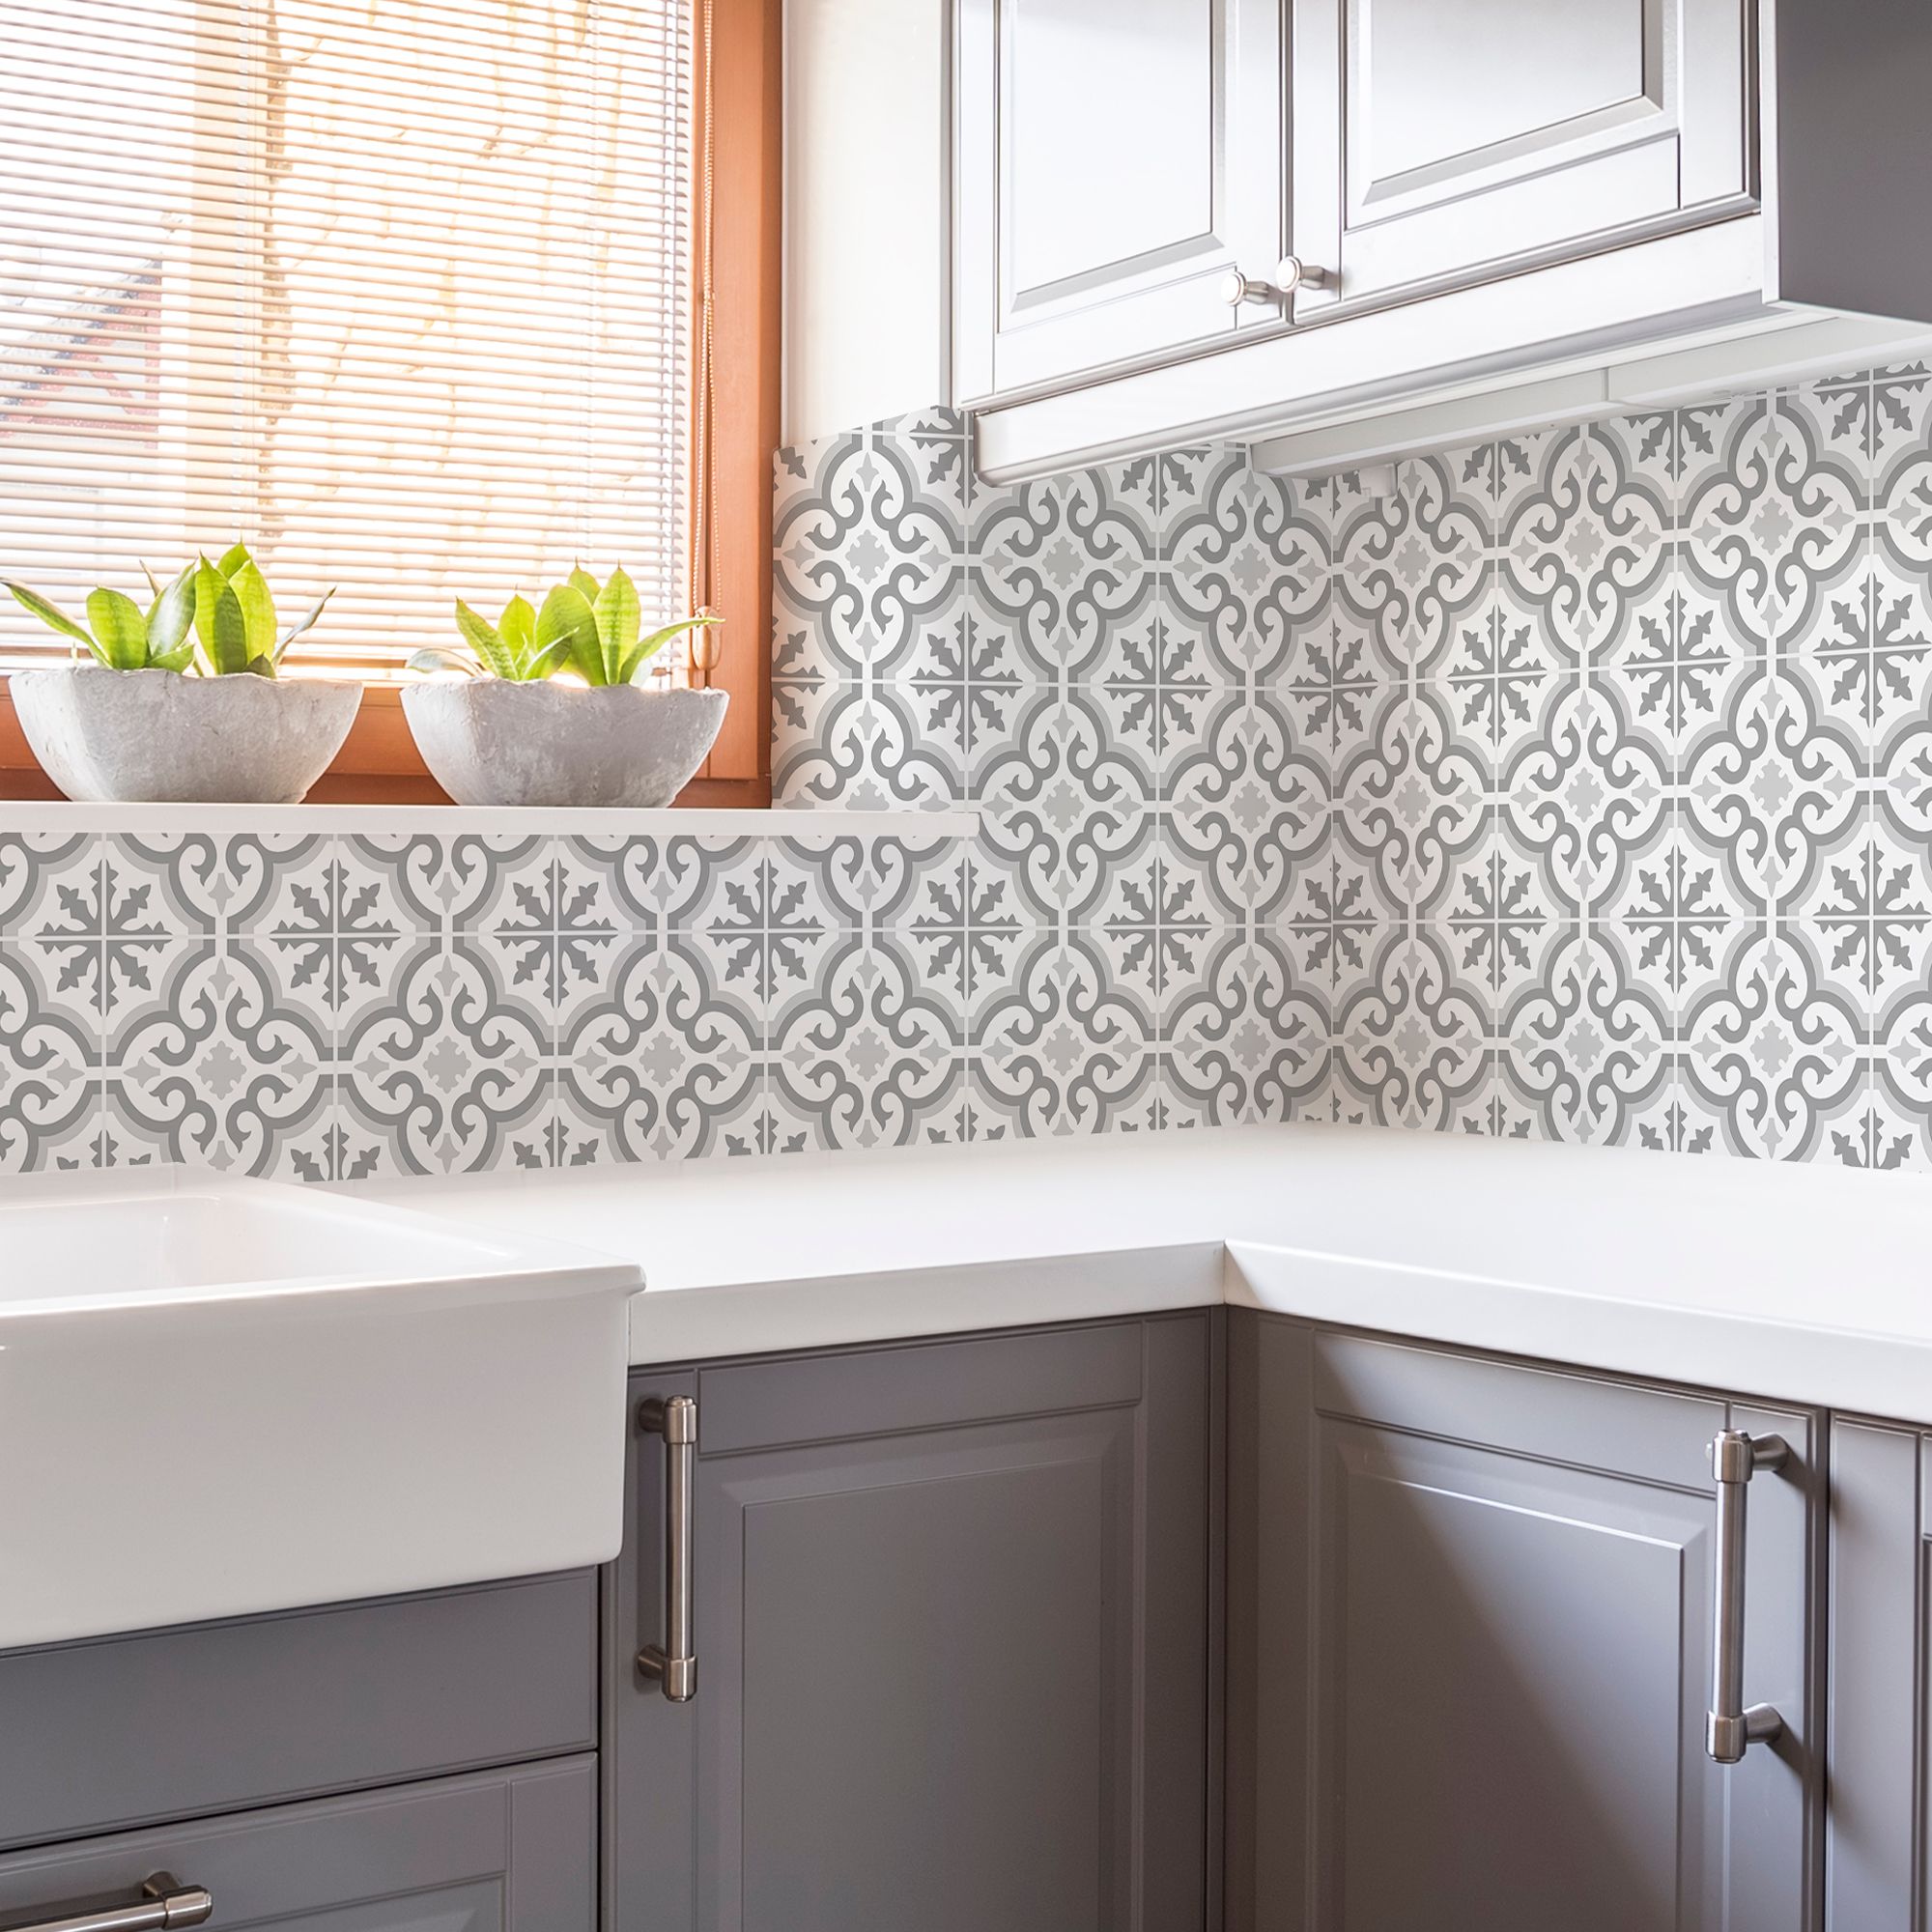
Traditional neutrals such as grey, taupe, and timber brown add calmness and sophistication to interior home design and will always be popular due to its subtleness, while warmer rich tones will pull through in 2023. According to Paula, terracotta red and rich browns are coming to the fore. Celadon green and navy will still remain key.
Neutrals introduce a calming atmosphere that is often balanced with darker layers. Silvery geometric outlines deliver wallpaper that is both masculine and contemporary. Styling is easy, work with black and grey interiors. Alternatively, bring colour back the space by selecting colourful soft furnishings that will act as a fun feature look.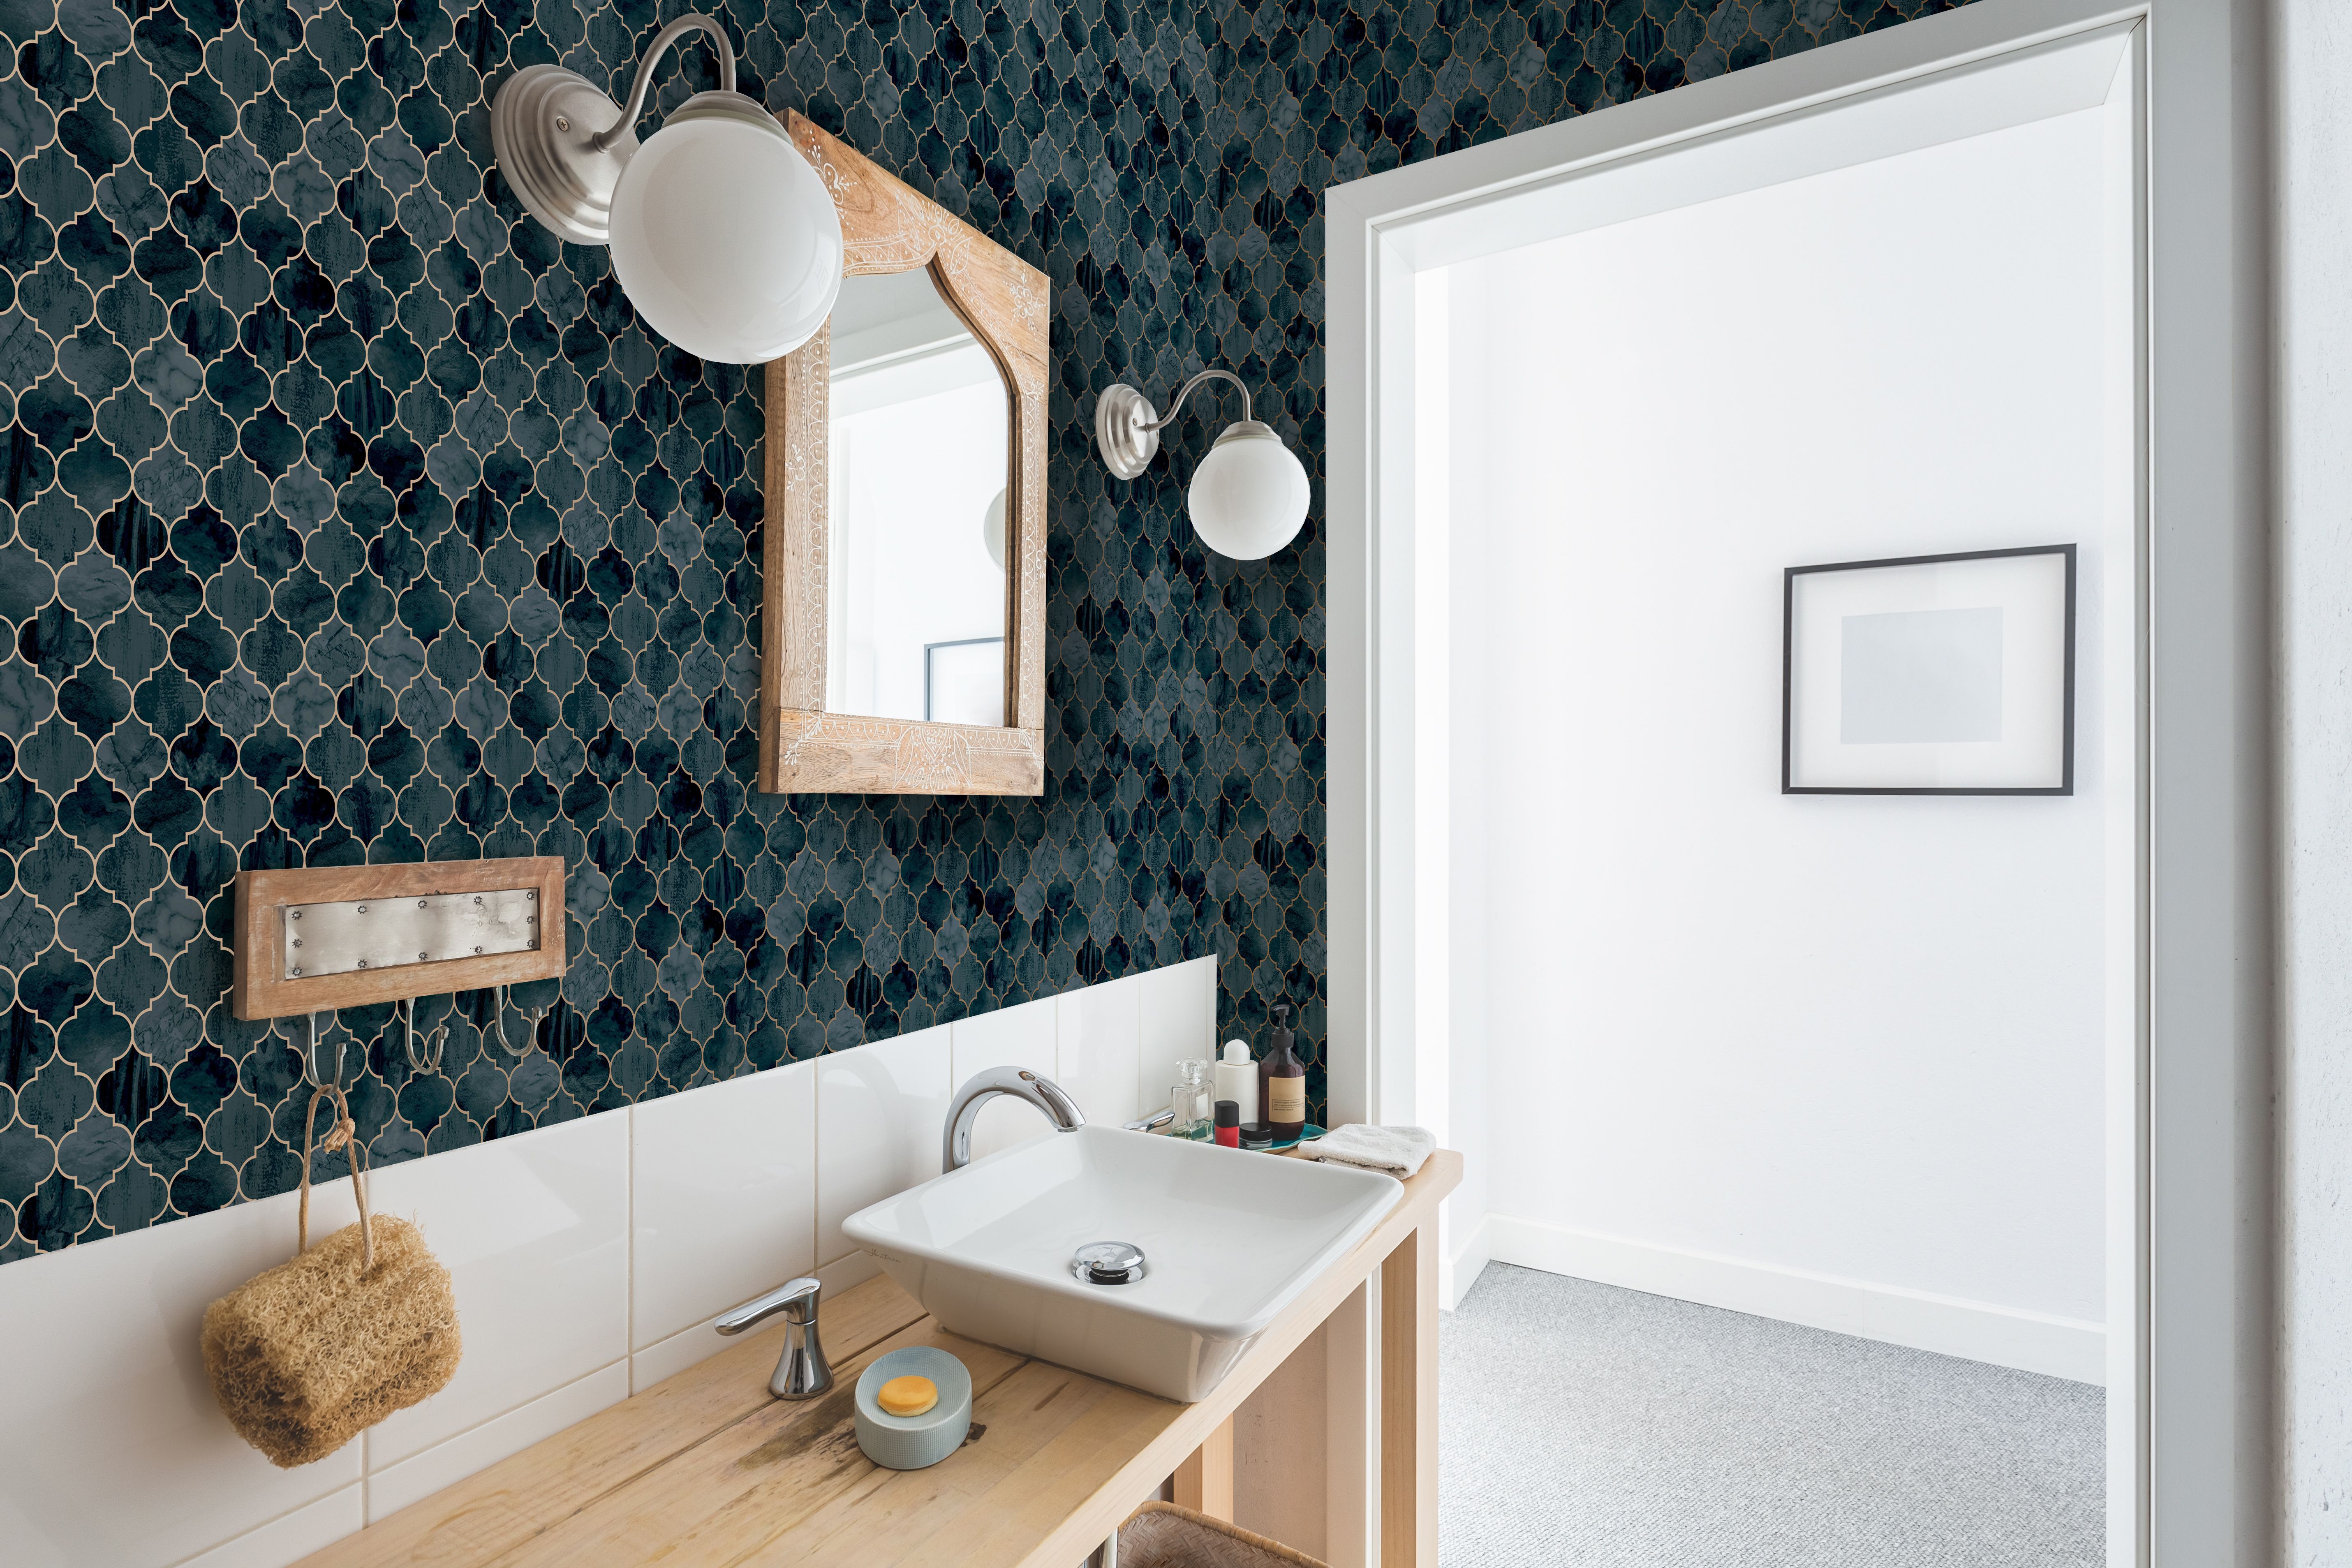
Teal is a shift away from true greens, but brings subtle green and blue elements of the ocean and nature to interiors, without the blaring intensity other greens and blues bring. The Contour Tegula Teal (RRP $93.50) wallpaper design oozes style with sophisticated copper detailing. This product is extra durable and designed to suit your bathroom or kitchen needs.
2023 Design Trends: Wood, Brick, Panels, Tiles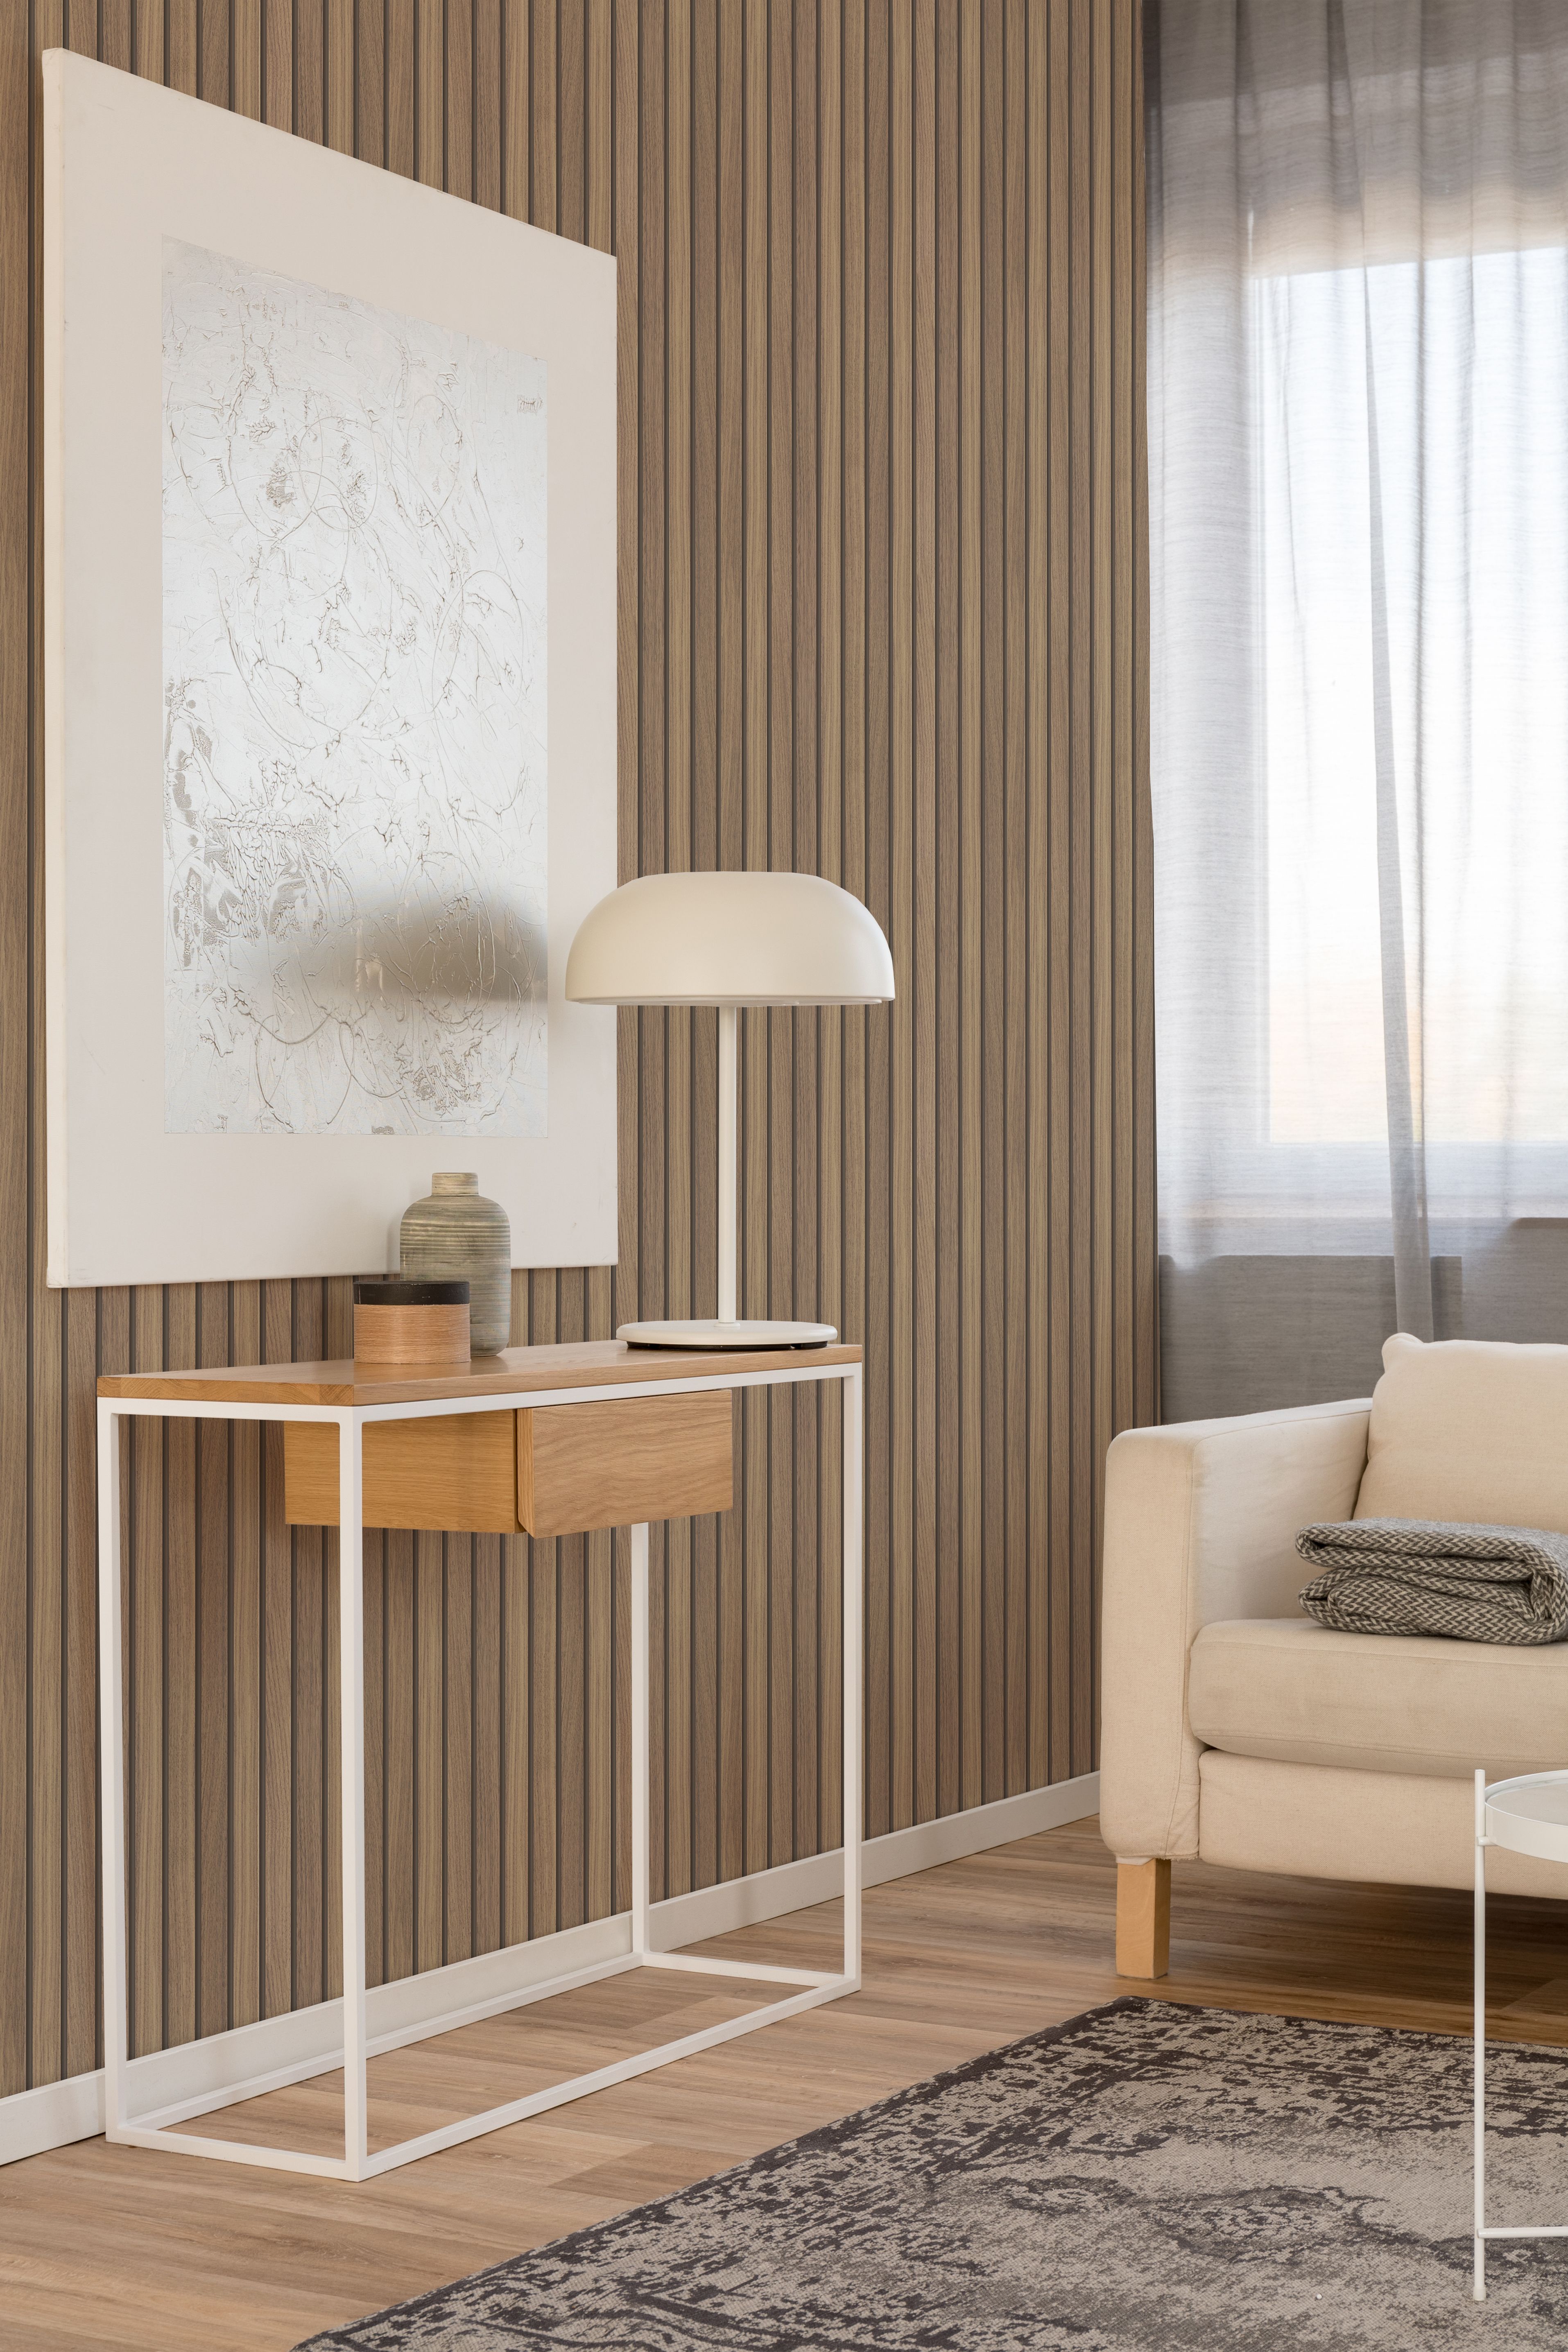
2023 will see a lot of realistic wallpapers that replicate wood, bricks, panels, and tiles. “This is a much easier and inexpensive way to achieve a look or trend in your room than going to the expense of the real thing,” says Paula. “Biophilia is still a key trend. Bring the outside in with lush green imagery and combining this with the realistic woods creates a really contemporary vibe.” Paula also notes Geometrics will continue to be popular in 2023. “Repetitive grids and fine lines bring harmony to a room and reduces stress and anxiety,” said Paula.
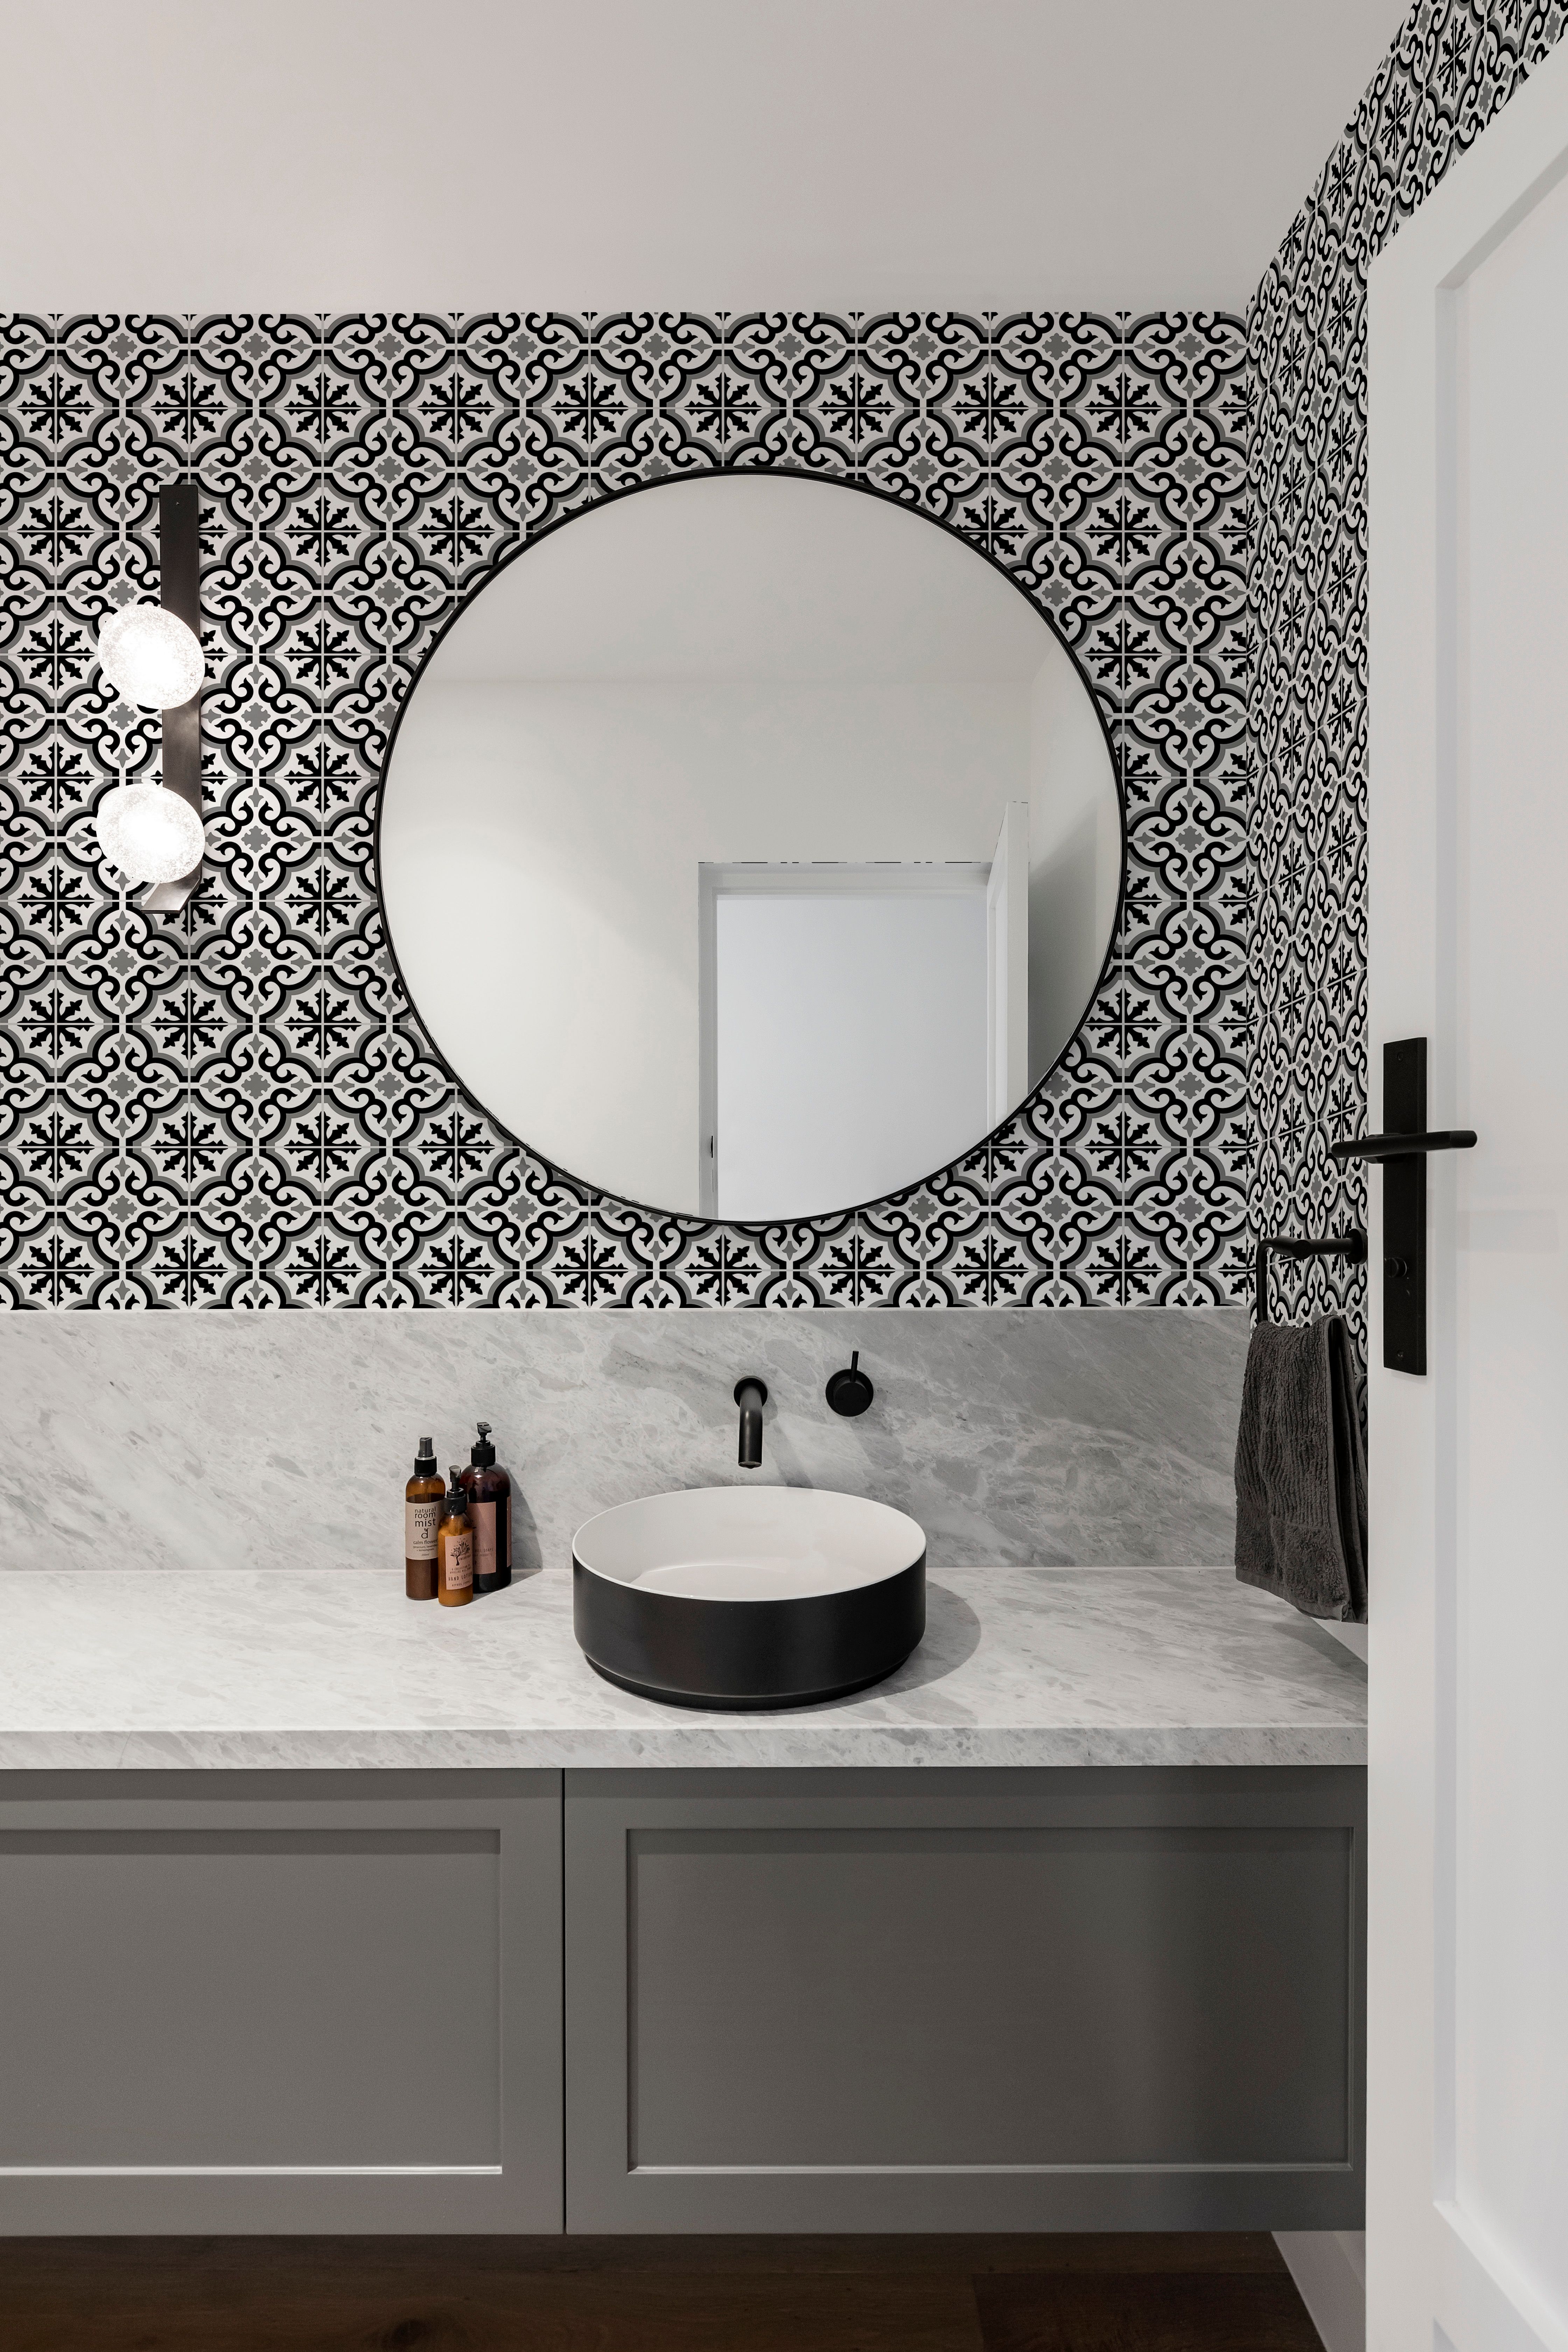
For those seeking middle ground between stripes and shapes, geometric wallpaper designs are a popular option. Tile-themed wallpaper and its simplified, structured design is on trend. Geometric arrangements with monochrome colour schemes offer pattern and routine, bringing a sense of tradition and comfort to rooms. The Contour Grecian Black wallpaper transports you to a traditional Greek island. Extra durable, this wallpaper is designed to suit your bathroom or kitchen needs. RRP $93.50 per roll.
Giving a naturally rustic, cosy feel to rooms, wood effect wallpapers are perfect for delivering a traditional aesthetic. Bringing a wood effect wallpaper into a contemporary space delivers modern rustic appeal. Superfresco Easy’s wooden slats Natural Wood Clad design adds depth and style to any interior space. The design gives a stunning 3D design. RRP: $84.35 per roll.
Add a touch of architectural detail to walls through timber panel designs. Providing depth and definition to walls, wood panelling look wallpaper also adds a chic look. The Superfresco Easy Wooden Panel design brings an element of luxury to any space. Featuring a 3D timber panel design, this wallpaper creates both depth and sophistication. Wall Panel Grey RRP: $84.35 per roll.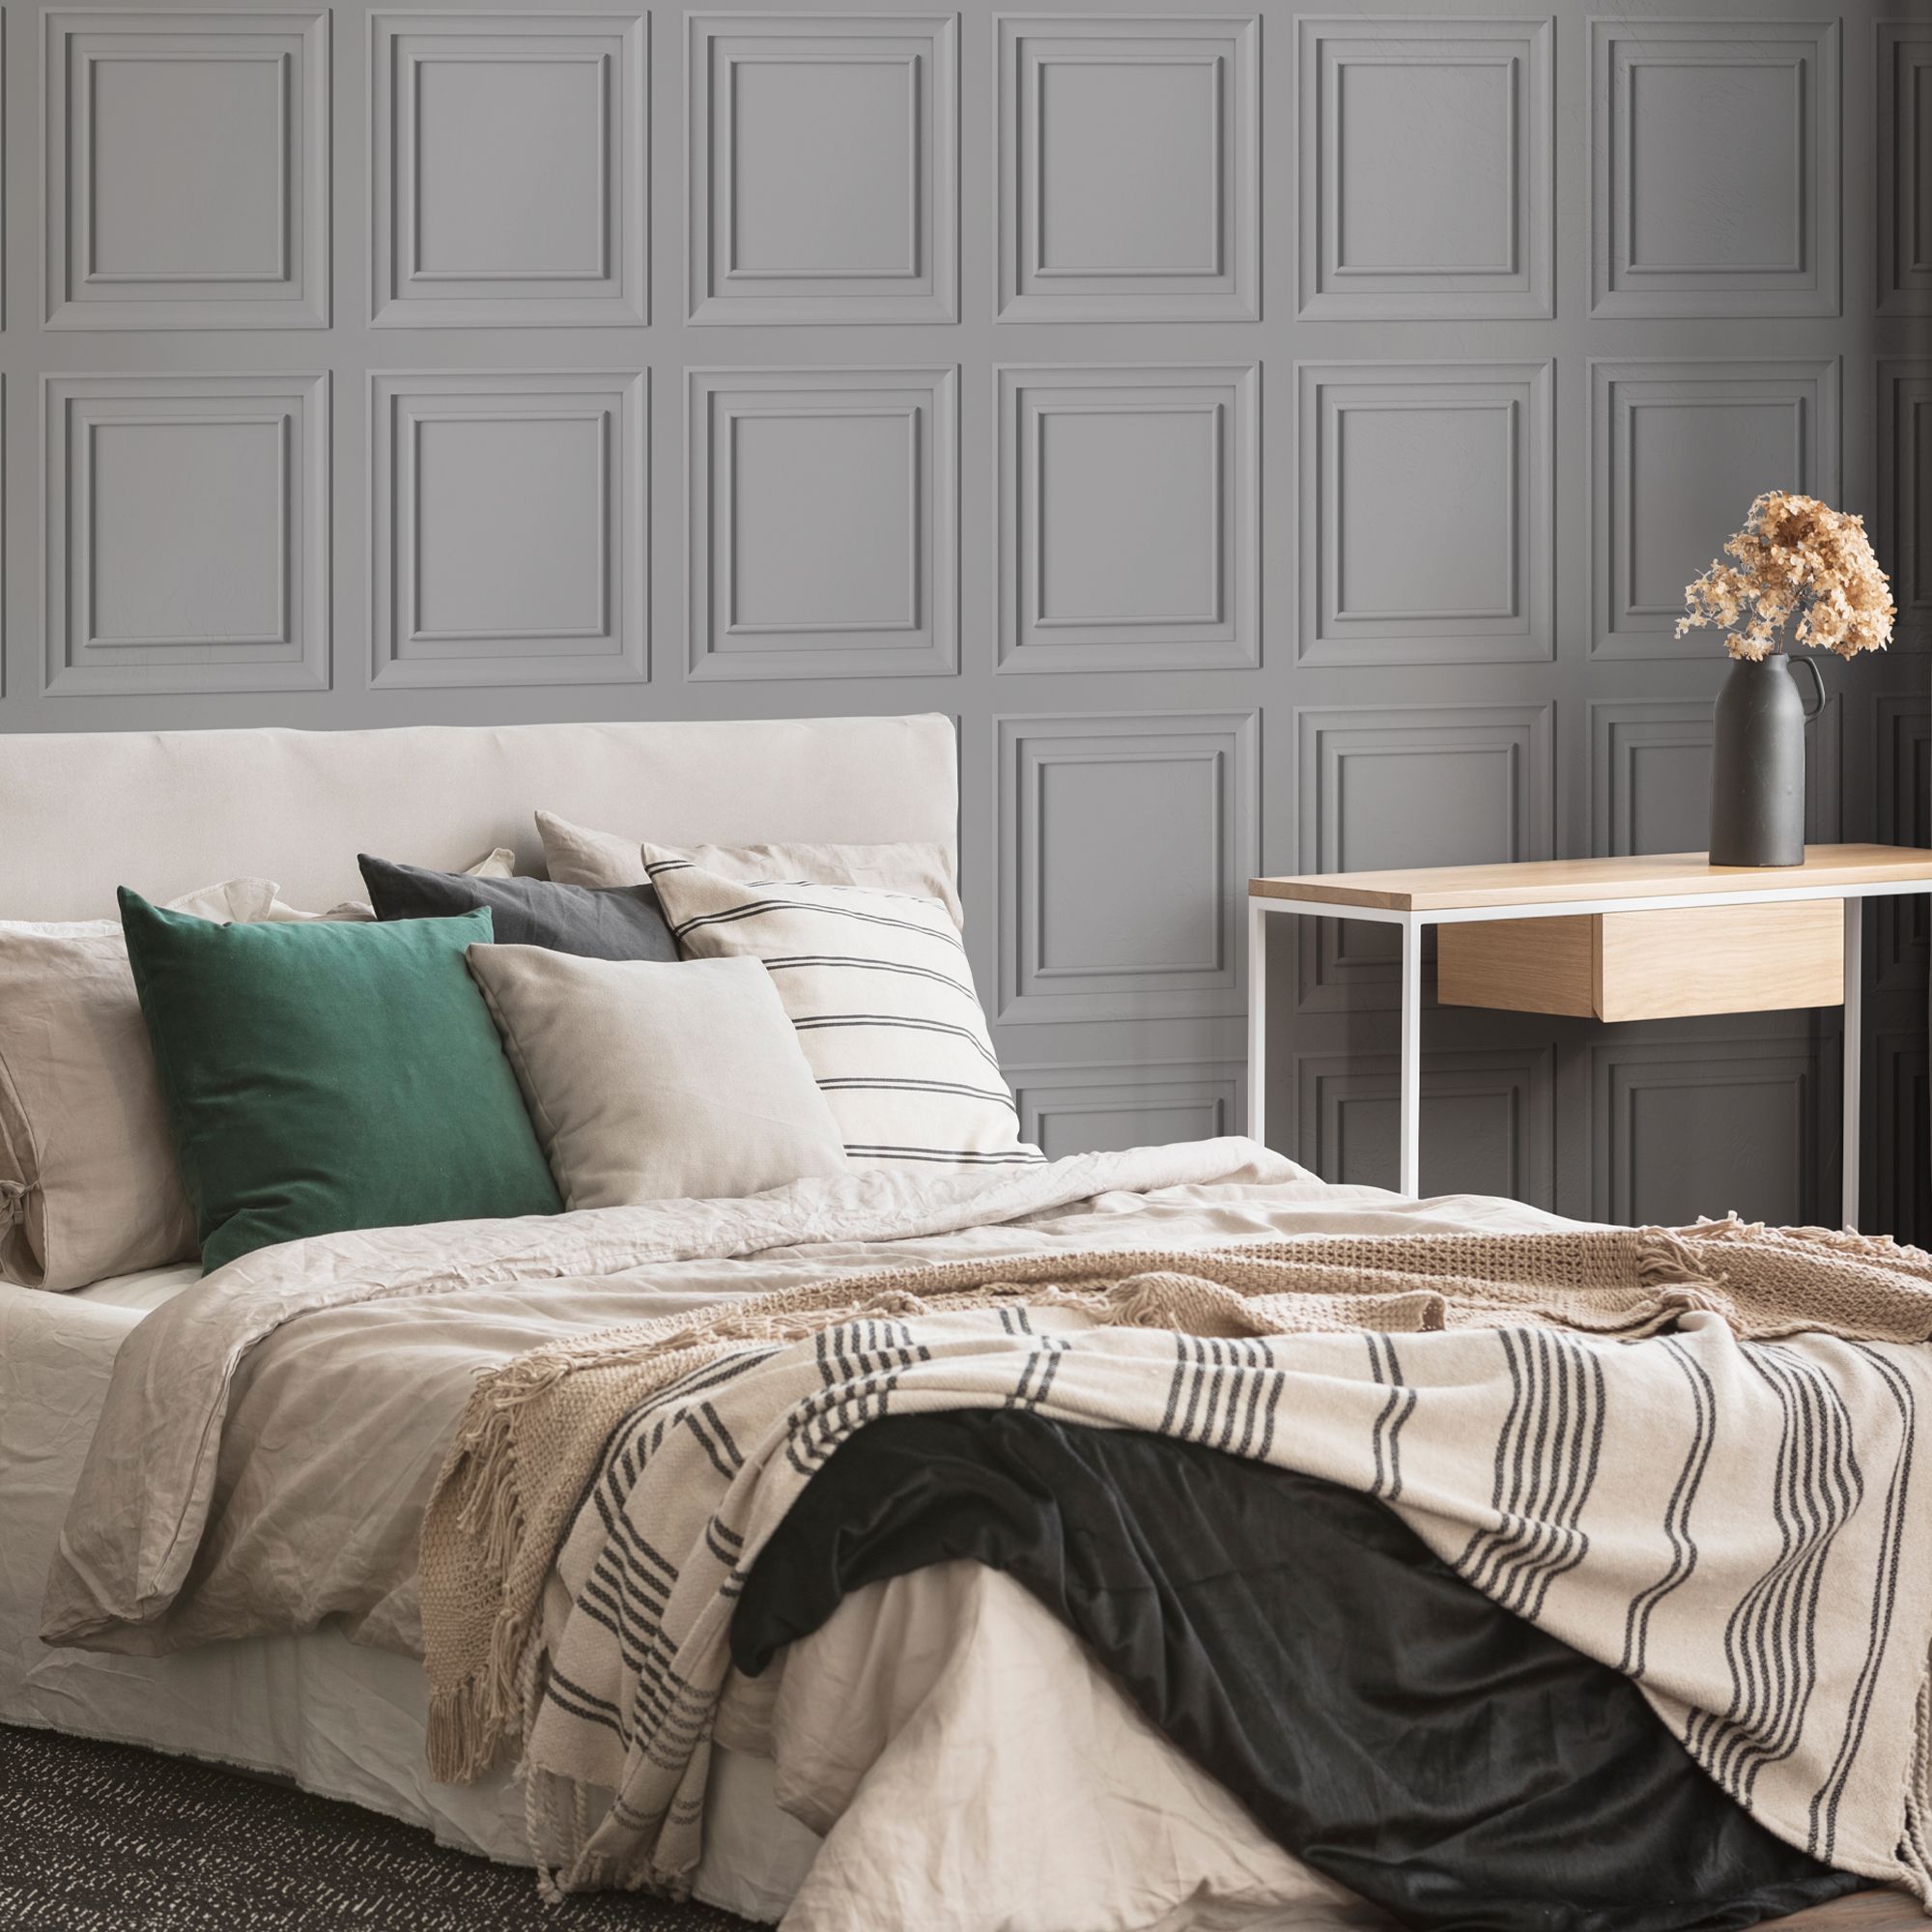
Once a major investment in a home’s look, wallpaper is now a design element that can be easily changed with the trends thanks to removable options, like Superfresco Easy. It’s ‘Paste the Wall’ technology allows homeowners and even renters alike to quickly put up wallpaper without the need for messy pasting tables and can be peeled off by hand without fear of ruining the wall beneath.
Superfresco Easy is available across at Bunnings Warehouse with prices starting at RRP $60 per roll. For more information visit www.superfrescoeasy.com.au
Paula recommends those starting with wallpaper to look to Pinterest and magazines to gather information. Creating a virtual or physical mood board of what you like is a good way to hone the perfect look.
With walls providing the perfect blank canvas for expression, Paula Taylor considers the key wallpaper and colour trends that will define our homes in 2023.
2023 Key Colour Trends: Neutrals
Traditional neutrals such as grey, taupe, and timber brown add calmness and sophistication to interior home design and will always be popular due to its subtleness, while warmer rich tones will pull through in 2023. According to Paula, terracotta red and rich browns are coming to the fore. Celadon green and navy will still remain key.
Neutrals introduce a calming atmosphere that is often balanced with darker layers. Silvery geometric outlines deliver wallpaper that is both masculine and contemporary. Styling is easy, work with black and grey interiors. Alternatively, bring colour back the space by selecting colourful soft furnishings that will act as a fun feature look.
Teal is a shift away from true greens, but brings subtle green and blue elements of the ocean and nature to interiors, without the blaring intensity other greens and blues bring. The Contour Tegula Teal (RRP $93.50) wallpaper design oozes style with sophisticated copper detailing. This product is extra durable and designed to suit your bathroom or kitchen needs.
2023 Design Trends: Wood, Brick, Panels, Tiles
2023 will see a lot of realistic wallpapers that replicate wood, bricks, panels, and tiles. “This is a much easier and inexpensive way to achieve a look or trend in your room than going to the expense of the real thing,” says Paula. “Biophilia is still a key trend. Bring the outside in with lush green imagery and combining this with the realistic woods creates a really contemporary vibe.” Paula also notes Geometrics will continue to be popular in 2023. “Repetitive grids and fine lines bring harmony to a room and reduces stress and anxiety,” said Paula.
For those seeking middle ground between stripes and shapes, geometric wallpaper designs are a popular option. Tile-themed wallpaper and its simplified, structured design is on trend. Geometric arrangements with monochrome colour schemes offer pattern and routine, bringing a sense of tradition and comfort to rooms. The Contour Grecian Black wallpaper transports you to a traditional Greek island. Extra durable, this wallpaper is designed to suit your bathroom or kitchen needs. RRP $93.50 per roll.
Giving a naturally rustic, cosy feel to rooms, wood effect wallpapers are perfect for delivering a traditional aesthetic. Bringing a wood effect wallpaper into a contemporary space delivers modern rustic appeal. Superfresco Easy’s wooden slats Natural Wood Clad design adds depth and style to any interior space. The design gives a stunning 3D design. RRP: $84.35 per roll.
Add a touch of architectural detail to walls through timber panel designs. Providing depth and definition to walls, wood panelling look wallpaper also adds a chic look. The Superfresco Easy Wooden Panel design brings an element of luxury to any space. Featuring a 3D timber panel design, this wallpaper creates both depth and sophistication. Wall Panel Grey RRP: $84.35 per roll.
Once a major investment in a home’s look, wallpaper is now a design element that can be easily changed with the trends thanks to removable options, like Superfresco Easy. It’s ‘Paste the Wall’ technology allows homeowners and even renters alike to quickly put up wallpaper without the need for messy pasting tables and can be peeled off by hand without fear of ruining the wall beneath.
Superfresco Easy is available across at Bunnings Warehouse with prices starting at RRP $60 per roll. For more information visit www.superfrescoeasy.com.au
Till next time... which wallpaper is more your style?